
DEF Rubber
How to remove and install the Floor Scrubber Squeegees?
Maintaining and Replacing Floor Scrubber Squeegees: A Step-by-Step Guide
The benefits of Floor Scrubbers in enhancing our work efficiency are evident, which is why an increasing number of people are using them. However, to ensure the long-lasting and efficient operation of a floor scrubber, regular maintenance and squeegee blade replacement are essential. If you’re new to using a floor scrubber, you might be unsure about how to remove and install the water recovery assembly and squeegee blades. DEF Rubber is here to provide you with a tutorial on removing and installing squeegee blades, although it’s important to note that there are various brands and models of floor scrubbers available in the market. We’ll provide a simple demonstration using the most common water recovery assembly.
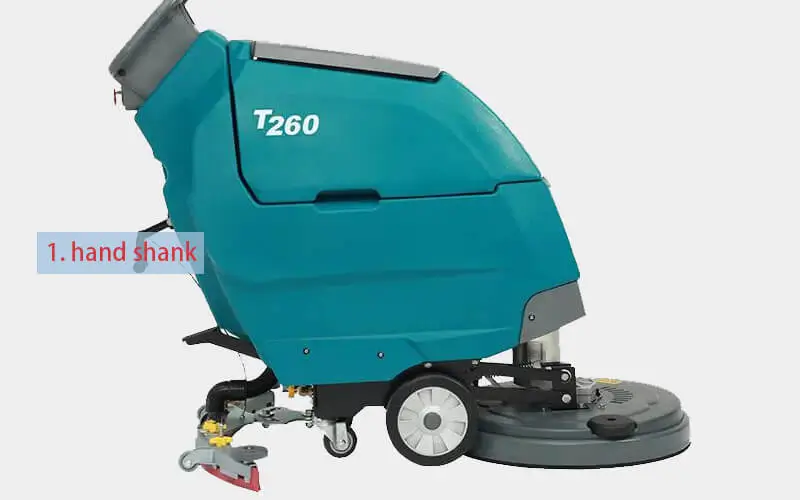
- The squeegee blades are installed on the water recovery assembly of the floor scrubber. To remove and install the blades, you first need to detach the water recovery assembly. Lower the water recovery assembly by pulling down the handle labeled as “1” in the image below.
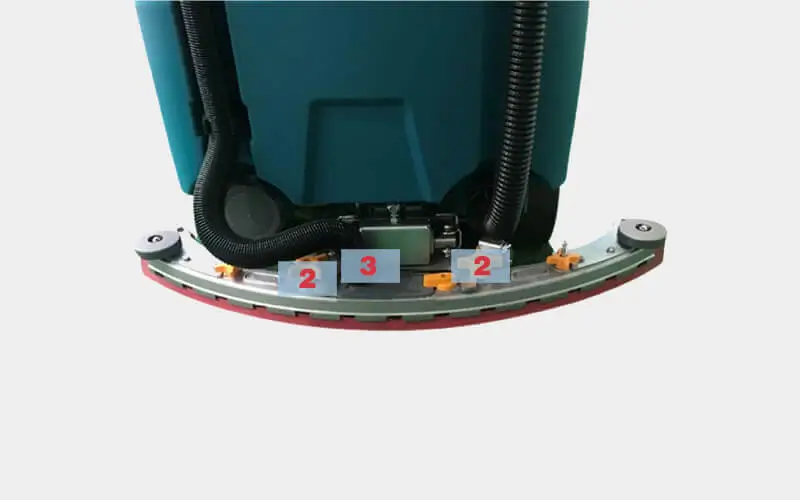
- Unscrew the two yellow nuts labeled as “2” and remove the discharge hose labeled as “3.”
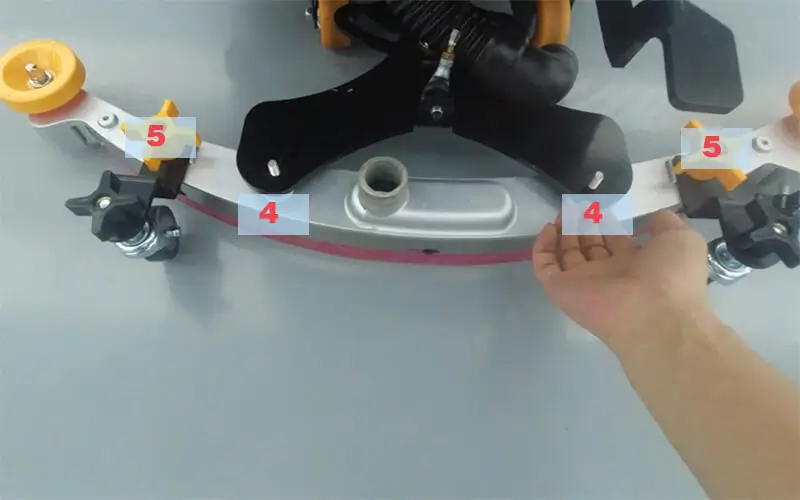
- Take the water recovery assembly off the bracket labeled as “4” and remove the caster wheels labeled as “5” by unscrewing the two yellow nuts.
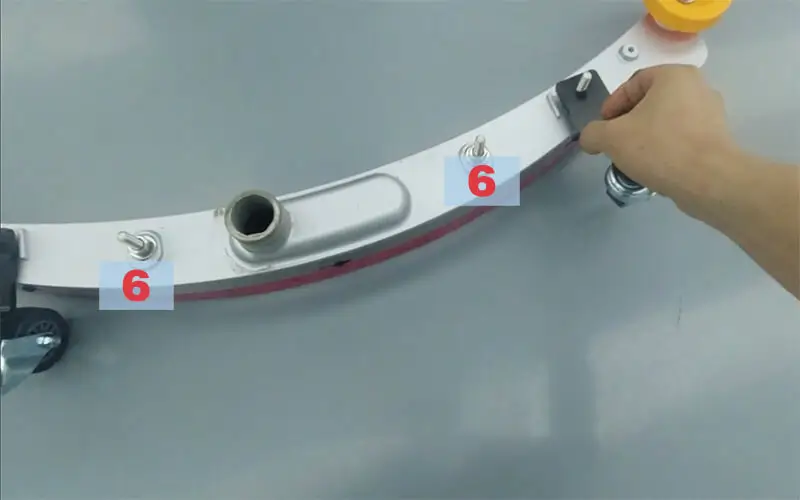
- After unscrewing the nut labeled as “6,” flip the water recovery assembly over.
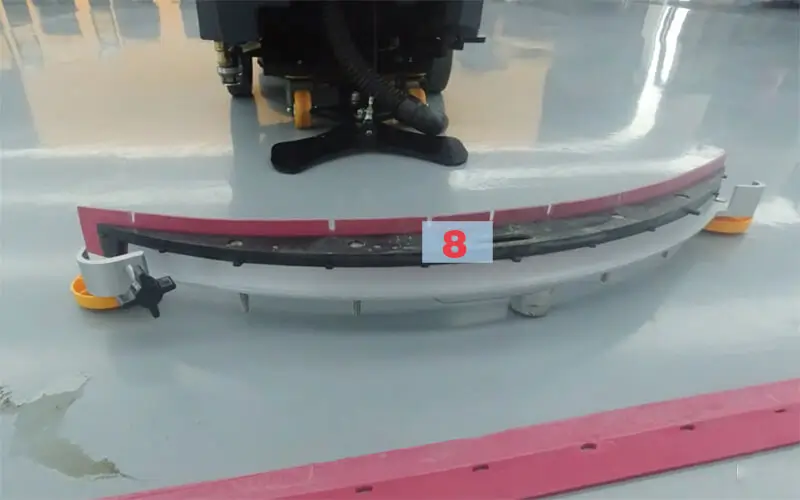
- Loosen the tension bolt labeled as “7” in the image to remove the metal strip and the outer ring of the rear squeegee blade.

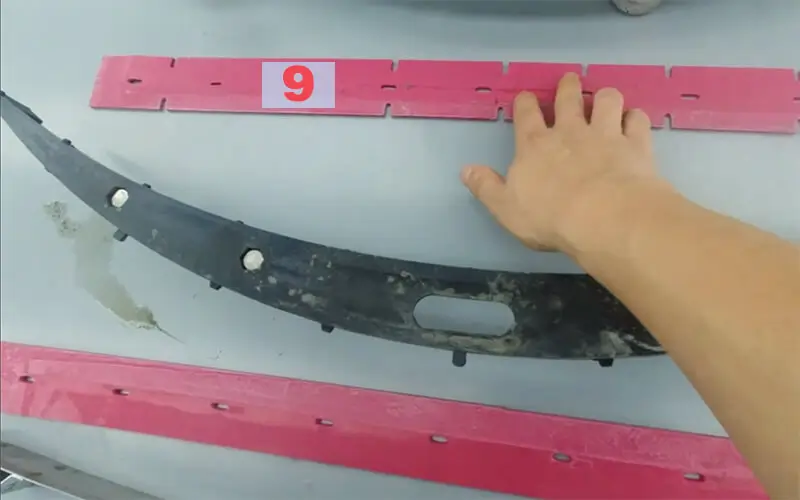
- Remove the front squeegee blade and the blade support bracket from the location shown in the diagram.
- The squeegee blade removal is complete. The installation process can follow the same steps as the removal process, but it is crucial to ensure that the squeegee blades are installed correctly. The rear squeegee blade with a U-shaped notch on the outer ring should be installed as the rear blade on the water recovery assembly’s outer ring.
Points to note during squeegee blade installation:
- When removing or installing the water recovery assembly, ensure that the floor scrubber is powered off.
- While removing the water recovery assembly, check if the wastewater hose is blocked.
- During installation, pay attention to the angle and height alignment of the squeegee blades. Ensure they are level, without any wrinkles or protrusions, and that there are no unevenness or discrepancies in height from left to right.
- Avoid using excessive force to prevent damaging the squeegee blades and fasteners during removal and installation.
- During the installation process, make sure to align the squeegee blades with the corresponding holes, and ensure that the front and rear squeegee blades are not installed incorrectly.
- The caster wheels labeled as “5” in the image can be adjusted to set the water recovery assembly’s height from the floor. Sometimes, after replacing the squeegee blades, you may need to readjust the height to ensure optimal performance.